Node.Js with Livia || Demystifying User Authentication & Authorization (Part II)
Single Factor Authentication (SFA): Password Based

Single-factor authentication (SFA) is a fundamental security mechanism used to verify the identity of a user based on a single piece of information or factor. In this tutorial, we will implement password-based authentication using JSON Web Tokens (JWT) in a Node.js application. This method is widely used to secure web applications and APIs.
Prerequisites
Before we begin, ensure you have the following:
Node installed on your machine.
An understanding of JavaScript and Node.Js.
An understanding of MongoDB or any Database of your choice.
The concept of Authentication and Authorization.
A code editor like Visual Studio Code.
An API testing tool like Postman.
A GitHub account (optional but recommended for version control).
Project Setup
Let's start by creating a new Node.js project and installing the necessary packages. Open your terminal and follow these steps:
Create a new project folder:
 mkdir userAuth
 cd userAuth
Initialize a new Node.js project:
npm init -y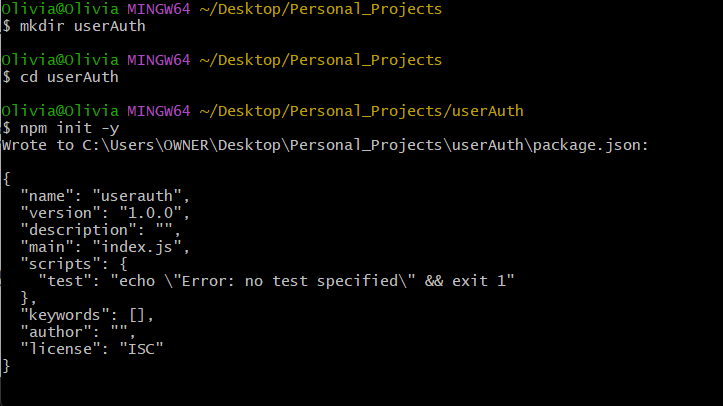
Install required packages:
npm install express bcrypt dotenv express-validator cors mongoose jsonwebtoken npm install --save-dev nodemonExpress: Express is a popular web application framework for Node.js that simplifies the process of building web applications and APIs. It provides a set of tools for routing, handling HTTP requests and responses, and middleware management.
Bcrypt: Bcrypt is a password-hashing library that helps you securely store and verify passwords. It uses a one-way hashing algorithm, making it difficult for attackers to reverse-engineer passwords from their hashes.
Dotenv: Dotenv is a utility that loads environment variables from a
.envfile into your Node.js application. It's commonly used for storing sensitive information like API keys and database credentials securely. In this case, we would be storing our secret key for hashing, port number and so on.Express-validator: Express-validator is a middleware for Express.js that simplifies request data validation. It allows you to easily validate and sanitize user inputs from HTTP requests, helping prevent security vulnerabilities and data issues.
Cors: CORS (Cross-Origin Resource Sharing) is a package that enables or restricts cross-origin HTTP requests in your web application. It's used to control which domains are allowed to access your server's resources, helping prevent unauthorized access.
Mongoose: Mongoose is an Object Data Modeling (ODM) library for MongoDB and Node.js. It simplifies database interactions by providing a structured way to define and manipulate data models and perform database operations.
Jsonwebtoken: Jsonwebtoken is a package for creating and verifying JSON Web Tokens (JWTs) in Node.js applications. JWTs are used for secure authentication and data exchange between the server and clients, often in stateless applications.
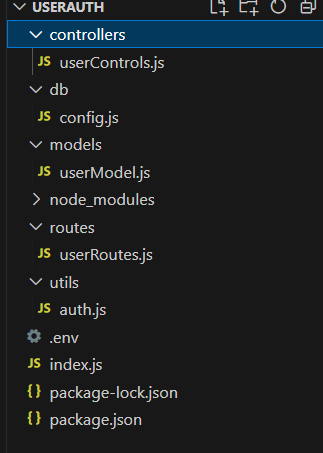
Create the necessary directories and files. We would be working with the common MVC (Models, Views, Controller) architectural pattern. so we would have a directory for our routes, models and controllers.
 mkdir db models routes utils controllers
 touch .env db/config.js models/userModel.js routes/userRoutes.js utils/auth.js controllers/userControls.js index.js
Our file structure becomes:
Create a Server using Express.js
- In your
index.jsfile write these lines of code:
// Importing required modules
const express = require("express");
const dotenv = require("dotenv");
const cors = require("cors");

const app = express();
dotenv.config();

const PORT = process.env.PORT;
app.use(cors());
app.use(express.json());

app.get('/', async (req, res) => {
    res.send("User Auth");
});

app.listen(PORT, () => {
    console.log(
        `Server running in ${process.env.NODE_ENV} mode on port ${PORT}`
    );
});
- In the
.envfile assigns values for your variablesPORTandNODE_ENV
PORT= 8000
NODE_ENV= development
- Now to run our server, in the terminal run:
node index.js
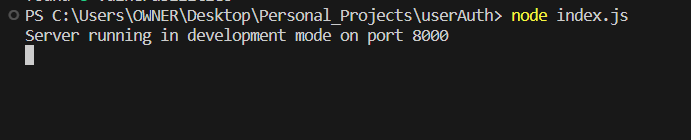
Our server is running fine, let's set up the database.
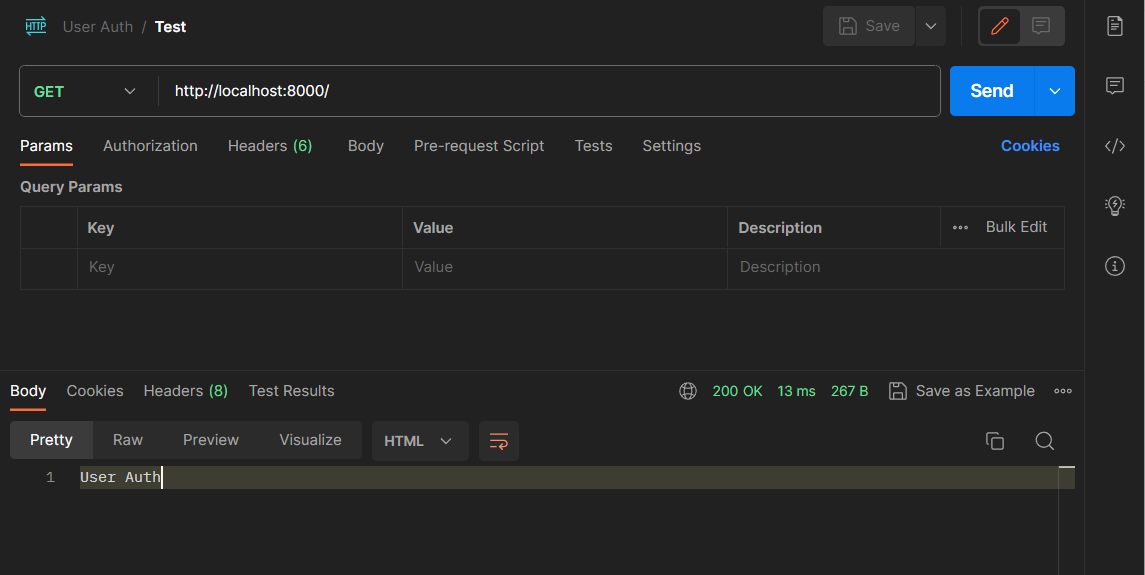
We can also test our base endpoint on Postman:
Database Setup
For our database, we would make use of MongoDB. The Mongoose library would be used to interact with our database.
Create a new connection in your MongoDB compass, the .env file should contain the database URI:
MONGODB_URI=mongodb://0.0.0.0:27017/userAuth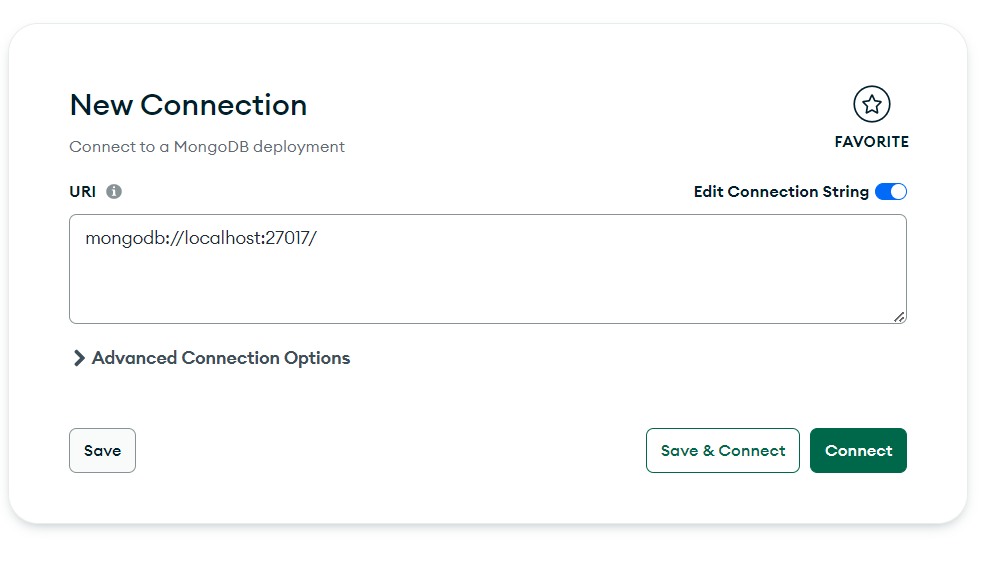
Write the MongoDB configuration in the
config/db.jsfile:const mongoose = require("mongoose"); mongoose.set("strictQuery", false); const connectDB = async () => { try { const conn = await mongoose.connect(process.env.MONGODB_URI, { useUnifiedTopology: true, useNewUrlParser: true, }); console.log(`MongoDB Connected: ${conn.connection.host}`); } catch (err) { console.error(`Error: ${err.message}`); process.exit(1); } }; module.exports = connectDB;Import the configuration function in the
index.jsfile:💡//newshows the newly inserted codes// Importing required modules const express = require("express"); const dotenv = require("dotenv"); const cors = require("cors"); const connectDB = require("./db/config"); //new const app = express(); dotenv.config(); connectDB(); //new const PORT = process.env.PORT; app.use(cors()); app.use(express.json()); app.get('/', async (req, res) => { res.send("User Auth"); }); app.listen(PORT, () => { console.log( `Server running in ${process.env.NODE_ENV} mode on port ${PORT}` ); });Run the index.js file again:

Creating User Model
Since we have our server running on a localhost and our database has been set up, next we need to create a User Model. This model is a database that contains all the user's details (In this case, the user's login details).
In our models/userModel.js:
const mongoose = require("mongoose");

const userSchema = new mongoose.Schema(
    {
        fullName:{
            type: String,
        },
        email:{
            type: mongoose.Schema.Types.Mixed,
            required: true,
        },
        password:{
            type: mongoose.Schema.Types.Mixed,
            required: true,
        }
    },
    {
        timestamps: true,
    }
);

const User = mongoose.model("user", userSchema);
module.exports = User;
Creating Middleware
We would be creating a simple authorization middleware. Authorization middleware would ensure that any user accessing the base URL has a token or is signed in.
In utils/auth.js file:
const jwt = require("jsonwebtoken");
const dotenv = require("dotenv");
const User = require("../models/userModel");

dotenv.config();
const PORT = process.env.PORT;
const secretKey = process.env.SECRET;

const auth = (req, res, next) => {
  const token = req.header("x-auth-token");
  if (!token)
    return res
      .status(401)
      .json({ msg: "No authenication token, authorization denied" });

  const verfied = jwt.verify(token, process.env.SECRET);
  if (!verfied)
    return res
      .status(401)
      .json({ msg: "Token verification failed, authorization denied" });

  req.user = verfied.id;
  next();
};

// exporting midleware logic
module.exports = {
  auth,
};
In the .env file, create a secrete variable:
PORT=8000
NODE_ENV=development
MONGODB_URI= mongodb://0.0.0.0:27017/userAuth
SECRET = dht2G5gA4678nbbgv!gHJ4s!iA
Creating Logic/Controllers
Controllers serve as an intermediary component that receives user input, updates the model data as needed, and coordinates the interaction between the model and the view. The Controller updates the Model based on user input and ensures that the View displays the updated data.
For this article, three logics would be created;
Register user
Sign-in a user
Fetch all users in the database (P.S: This is not advised in creating real-life projects, it's just to show the concept of authorization)
Register user
In the controllers/userControls.js:
// import necessary modules
const bcrypt = require("bcrypt");
const jwt = require("jsonwebtoken");
const dotenv = require("dotenv");
// import model
const User = require("../models/userModel");

dotenv.config();

// Register User logic
const register = async (req, res) => {
  try {
    let { email, password, fullName } = req.body;
    const salt = await bcrypt.genSalt();

    bcrypt.hash(password, salt, async (err, hash) => {
      if (err) {
        res.status(500).send({
          data: {},
          message: err,
          status: 1,
        });
      } else {
        const user = new User({
          email,
          password: hash,
          fullName,
        });
        const registeredUser = await user.save();
        res.status(201).send({
          data: registeredUser,
          message: `User Registered Successfully`,
          status: 0,
        });
      }
    });
  } catch (err) {
    res.status(500).send({
      data: {},
      error: err.message,
      sataus: 1,
    });
  }
};

// User login Logic
const login = async (req, res) => {
  try {
    const { email, password } = req.body;
    const user = await User.findOne({ email: email });
    if (!user) {
      res.status(401).send({
        data: {},
        message: `User with ${email} not found!`,
        status: 1,
      });
    } else {
      bcrypt.compare(password, user.password, (err, result) => {
        if (err) {
          res.status(500).send({
            data: {},
            message: err,
            status: 1,
          });
        } else if (!result) {
          res.status(401).send({
            data: {},
            message: "Email or password is incorrect",
            status: 1,
          });
        } else {
          const token = jwt.sign({ id: user._id }, secretKey);
          res.status(200).send({
            data: {
              token,
              id: user._id,
              email: user.email,
            },
            message: "User logged in successfully",
            status: 0,
          });
        }
      });
    }
  } catch (err) {
    res.status(500).send({
      data: {},
      error: err.message,
      sataus: 1,
    });
  }
};

// Fetch all users logic
const getUsers = async (req, res) => {
  try {
    const users = await User.find({});
    res.status(200).send({
      data: users,
      message: "All Users",
      status: 0,
    });
  } catch (err) {
    res.status(500).send({
      data: {},
      error: err.message,
      sataus: 1,
    });
  }
};

// exporting logic functions
module.exports = {
  register,
  login,
  getUsers,
};
Let's break down the key parts of this code:
Importing Necessary Modules:
bcrypt: This module is used for hashing passwords securely.jwt: It's used for creating and verifying JSON Web Tokens, typically used for authentication.dotenv: A module for loading environment variables from a.envfile.User: It imports the user model from "../models/userModel."
dotenv.config():
- This line loads environment variables from a
.envfile into the Node.js process, allowing you to access them usingprocess.env.
- This line loads environment variables from a
Register User Logic:
The
registerfunction handles user registration.It takes user information (email, password, fullName) from the request body.
It generates a salt for password hashing using
bcrypt.genSalt.It then hashes the user's password and saves the hashed password and other user information to the database using the
Usermodel.If successful, it sends a response with status code 201 (created) and a success message. If there's an error, it sends a status code 500 (internal server error) with an error message.
User Login Logic:
The
loginfunction handles user login.It takes the email and password from the request body.
It attempts to find a user with the provided email using
User.findOne.If a user is found, it compares the provided password with the stored hashed password using
bcrypt.compare.If the password matches, it generates a JSON Web Token (JWT) using
jwt.sign, which includes the user's ID.It sends a response with the JWT and user information if the login is successful. If there are errors (e.g., user not found, incorrect password), it sends appropriate error responses.
Fetch All Users Logic:
The
getUsersfunction retrieves all users from the database usingUser.find.It sends a response with the retrieved user data if successful.
If there's an error, it sends a status code 500 with an error message.
Exporting Logic Functions:
- Finally, all these logic functions (
register,login, andgetUsers) are exported so that they can be used in other parts of the application, typically in routes or controllers.
- Finally, all these logic functions (
express-validator module.Creating Routes
Routing defines how the client requests are handled by the application endpoints. For the course of this tutorial, we will be defining three routes:
The Register Users Route
The User Login Route
Get or Fetch all Users (which would be our protected route)
In our routes/userRoutes.js file:
// importing express-validator and other necessary modules
const { check, validationResult } = require("express-validator");
const express = require("express");
// createing a router specifically for handling routes related to users
const userRoute = express.Router();

// importing user model
const User = require("../models/userModel");

// importing logics or controllers
const { login,
        register,
        getUsers } = require("../controllers/userControls");
// importing middleware
const { auth } = require("../utils/auth");

// Define a route for user registration
userRoute.post(
  "/register",
   // Use express-validator to validate the request body
  [
    check("email")
      .not()
      .isEmpty()
      .withMessage("Email is empty")
      .isEmail()
      .withMessage("invalid email address")
      .normalizeEmail()
      .custom((email) => {
        const user = User.findOne({
          email,
        });
        if (user) {
          return "email already in use";
        }
      })
      .withMessage("email already in use"),

    check("password")
      .isLength({ min: 8, max: 15 })
      .withMessage("your password should have min and max length between 8-15")
      .matches(/\d/)
      .withMessage("your password should have at least one number")
      .matches(/[!@#$%^&*(),.?":{}|<>]/)
      .withMessage("your password should have at least one special character"),
  ],
   // Middleware function to handle validation errors or proceed to registration
  (req, res, next) => {
    const error = validationResult(req).formatWith(({ msg }) => msg);
    const hasError = !error.isEmpty();
    if (hasError) {
      res.status(422).json({ error: error.array() });
    } else {
      next();
    }
  },
  register // The registration controller function
);
// Define a route for user login
userRoute.post("/login", login);
// Define a route to get user data (protected by auth middleware)
userRoute.get("/", auth, getUsers);

module.exports = {
  userRoute,
};
Here's a breakdown of the key parts:
User Registration Route (
/register):Validates the email and password fields using
express-validator.Checks if the email is already in use in the database.
If there are validation errors, it returns a JSON response with the errors.
If validation passes, it calls the
registercontroller function to handle user registration.
User Login Route (
/login):- This route is straightforward and calls the
logincontroller function when a POST request is made to it.
- This route is straightforward and calls the
User Data Route (
/):This route is protected by the
authmiddleware, which ensures that only authenticated users can access it.It calls the
getUserscontroller function to retrieve user data.
Finally, in our index.js file:
// Importing required modules
const express = require("express");
const dotenv = require("dotenv");
const cors = require("cors");
const connectDB = require("./db/config");
const { userRoute } = require("./routes/userRoutes");

const app = express();
dotenv.config();
connectDB();

const PORT = process.env.PORT;
app.use(cors());
app.use(express.json());

app.use("/user", userRoute) // new


app.listen(PORT, () => {
    console.log(
        `Server running in ${process.env.NODE_ENV} mode on port ${PORT}`
    );
});
Let's break it down step by step:
Importing Required Modules:
express: The Express.js framework for building web applications.dotenv: A module for loading environment variables from a.envfile.cors: Middleware for handling Cross-Origin Resource Sharing (CORS) to allow or restrict web applications running at one origin (domain) to make requests to a different origin.connectDB: A function for connecting to the database.userRoute: A router object containing user-related routes.
Creating an Express Application:
const app = express();: This line initializes an Express application instance, which will be used to define routes, middleware, and handle HTTP requests.
Loading Environment Variables:
dotenv.config();: This loads environment variables from a.envfile into the Node.js process. It allows you to access these variables usingprocess.env.
Connecting to the Database:
connectDB();: This is a function call to establish a connection to the database. It's typically used to connect to a MongoDB or other database.
Configuring the Port:
const PORT = process.env.PORT || 5050;This line sets the port on which the server will listen. It checks if ThePORTenvironment variable is defined and uses it. If not, it defaults to port 5050.
Configuring Middleware:
app.use(cors());: This line adds the CORS middleware to the Express application. It enables cross-origin requests from different domains.app.use(express.json());: This middleware parses incoming JSON data in the request body and makes it accessible inreq.bodyfor route handlers.
Defining Routes:
app.use("/user", userRoute);: This line mounts theuserRouterouter at the path "/user." It means that all routes defined inuserRoutewill be accessible under the "/user" URL path.
Starting the Server:
app.listen(PORT, () => { ... });: This code starts the Express server and makes it listen on the specifiedPORT. When the server starts successfully, it logs a message indicating the environment mode and the port it's listening on.
Testing Routes
Using any API testing tools like Postman all three endpoints created would be tested
Running our server locally by inputting the following in the terminal:
node index.js
User Registration Endpoint
http://localhost:8000/user/registerIf we try creating a user with an invalid password we get a bad response:

Let's make everything right and create a user:
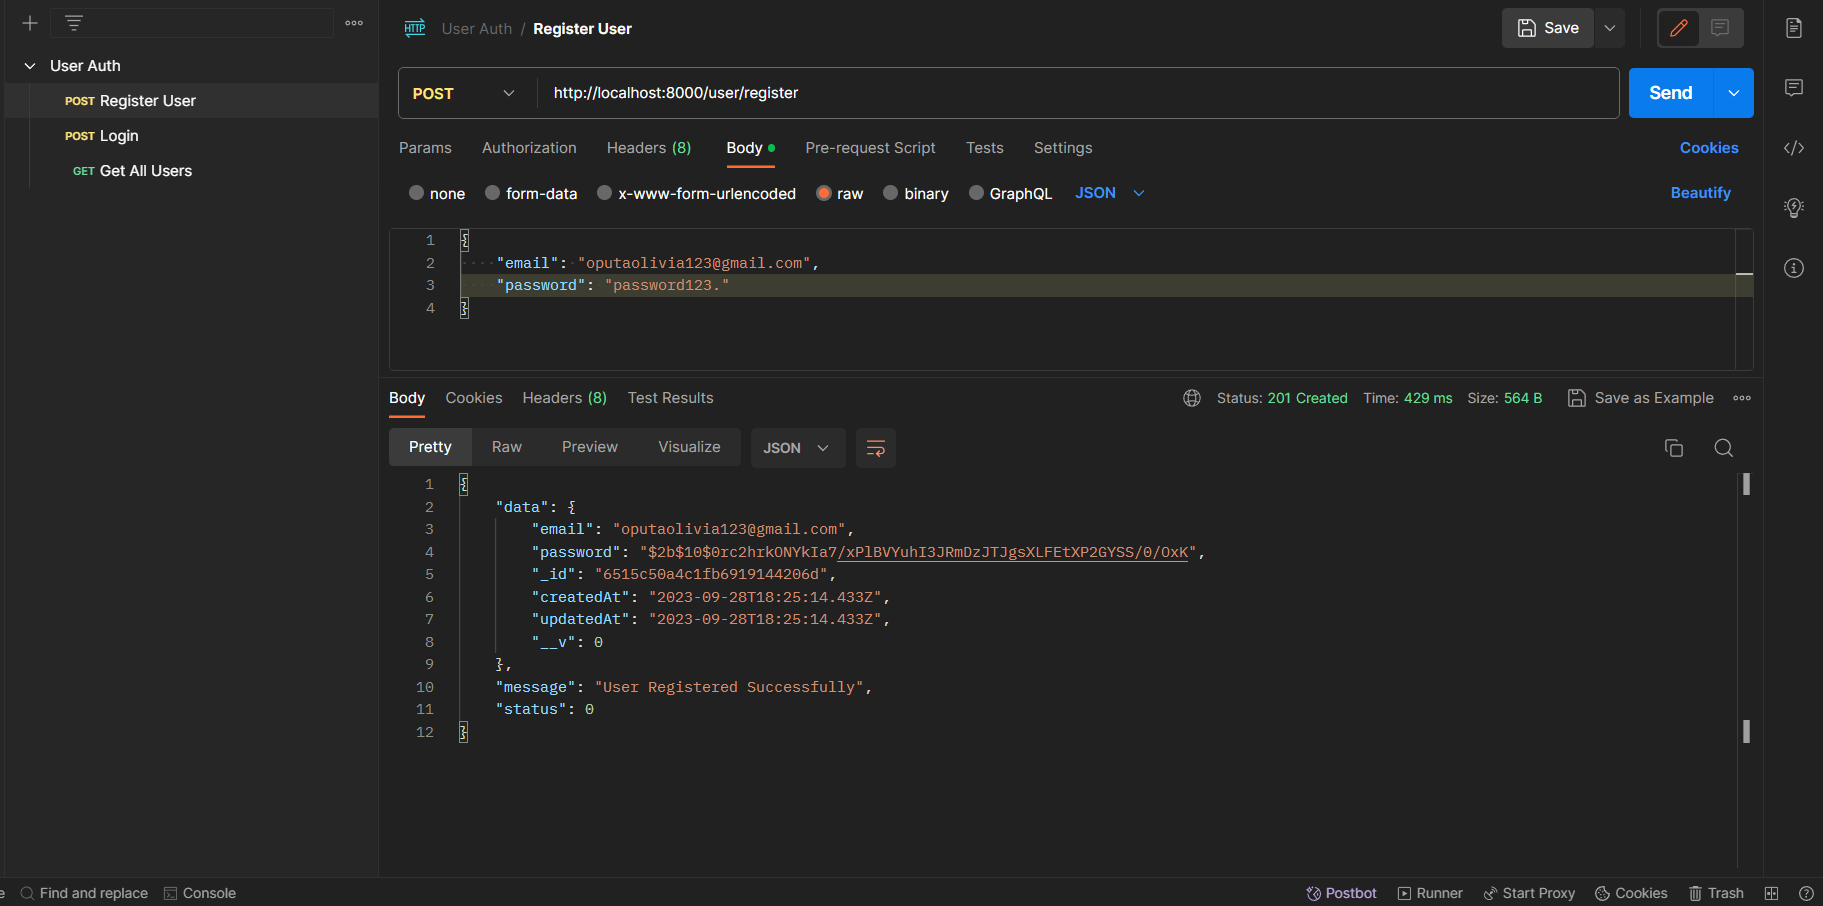
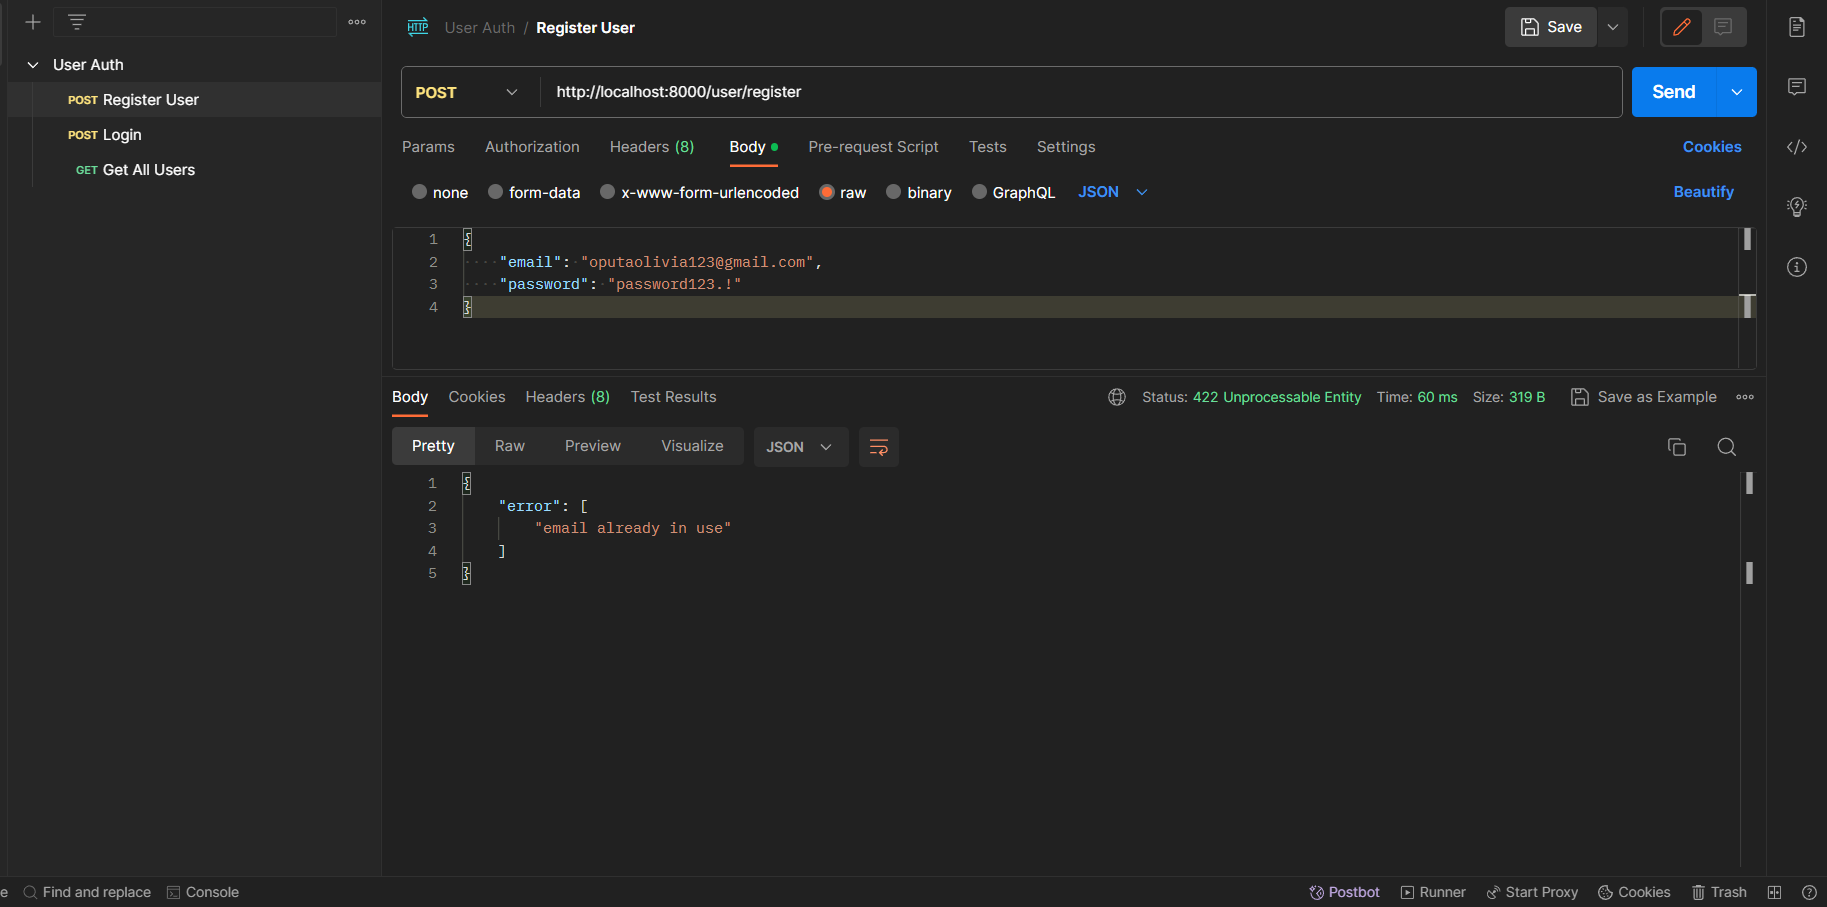
Finally, we have our user registered, let's try using the same email to register another user, hoping to get a bad response (LOL):
User Login Endpoint
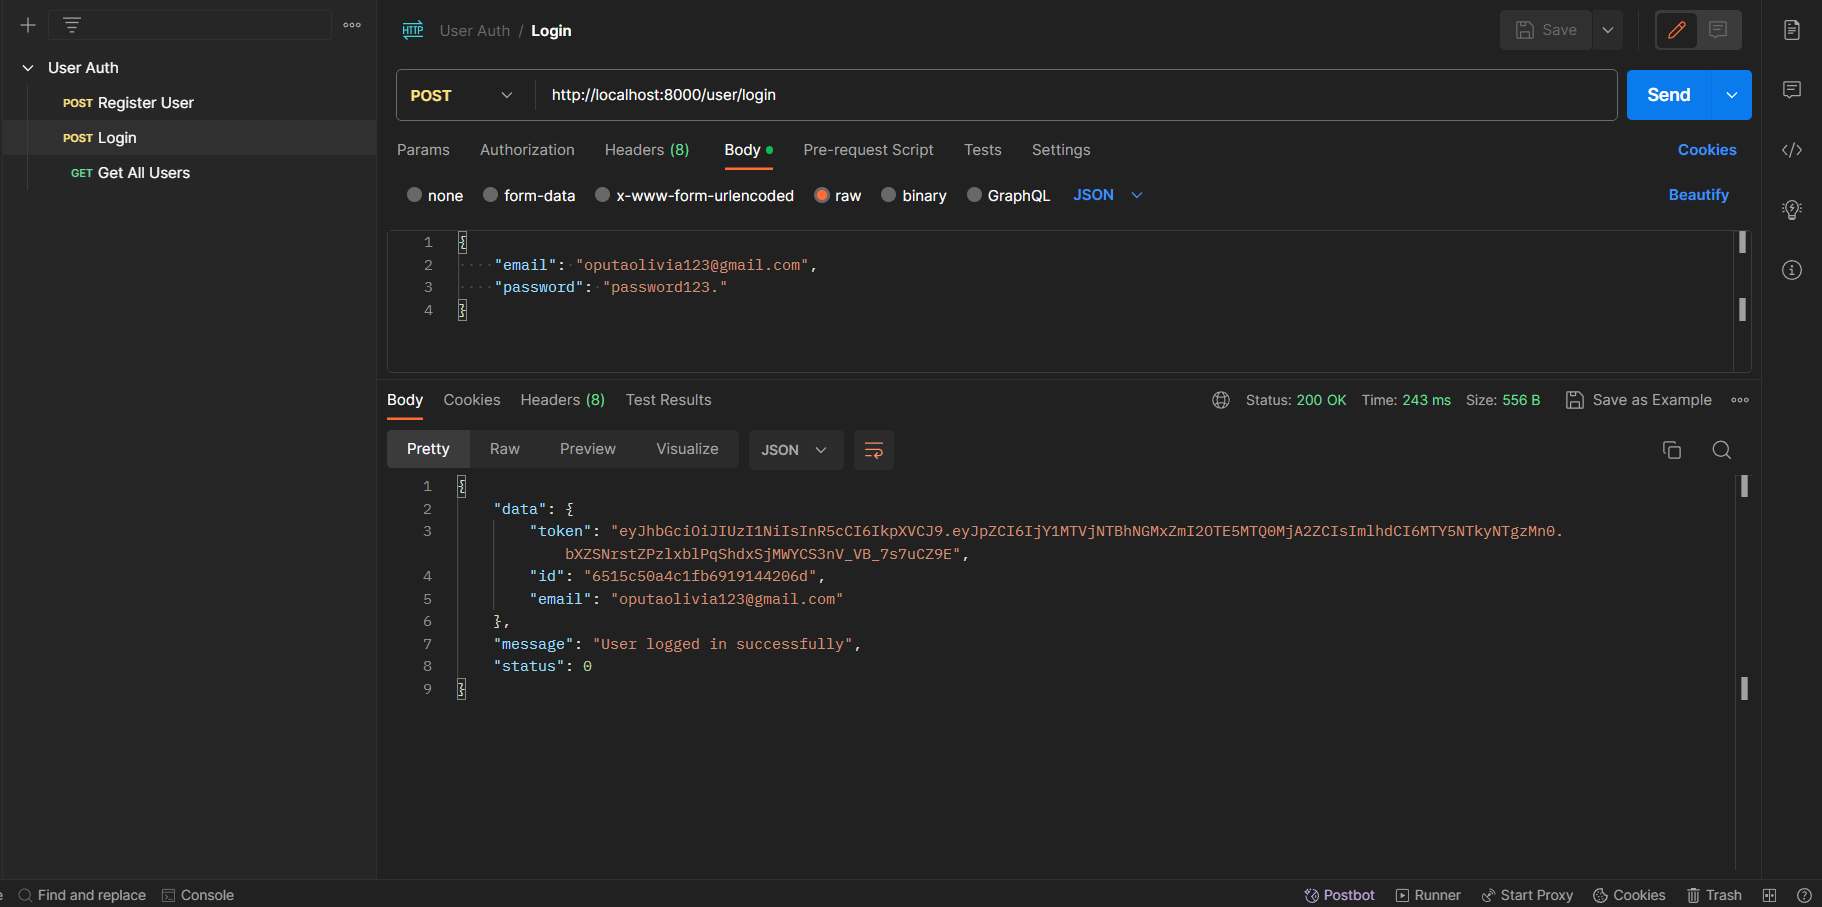
http://localhost:8000/user/loginLet's log in with the correct credentials we used in creating our user:
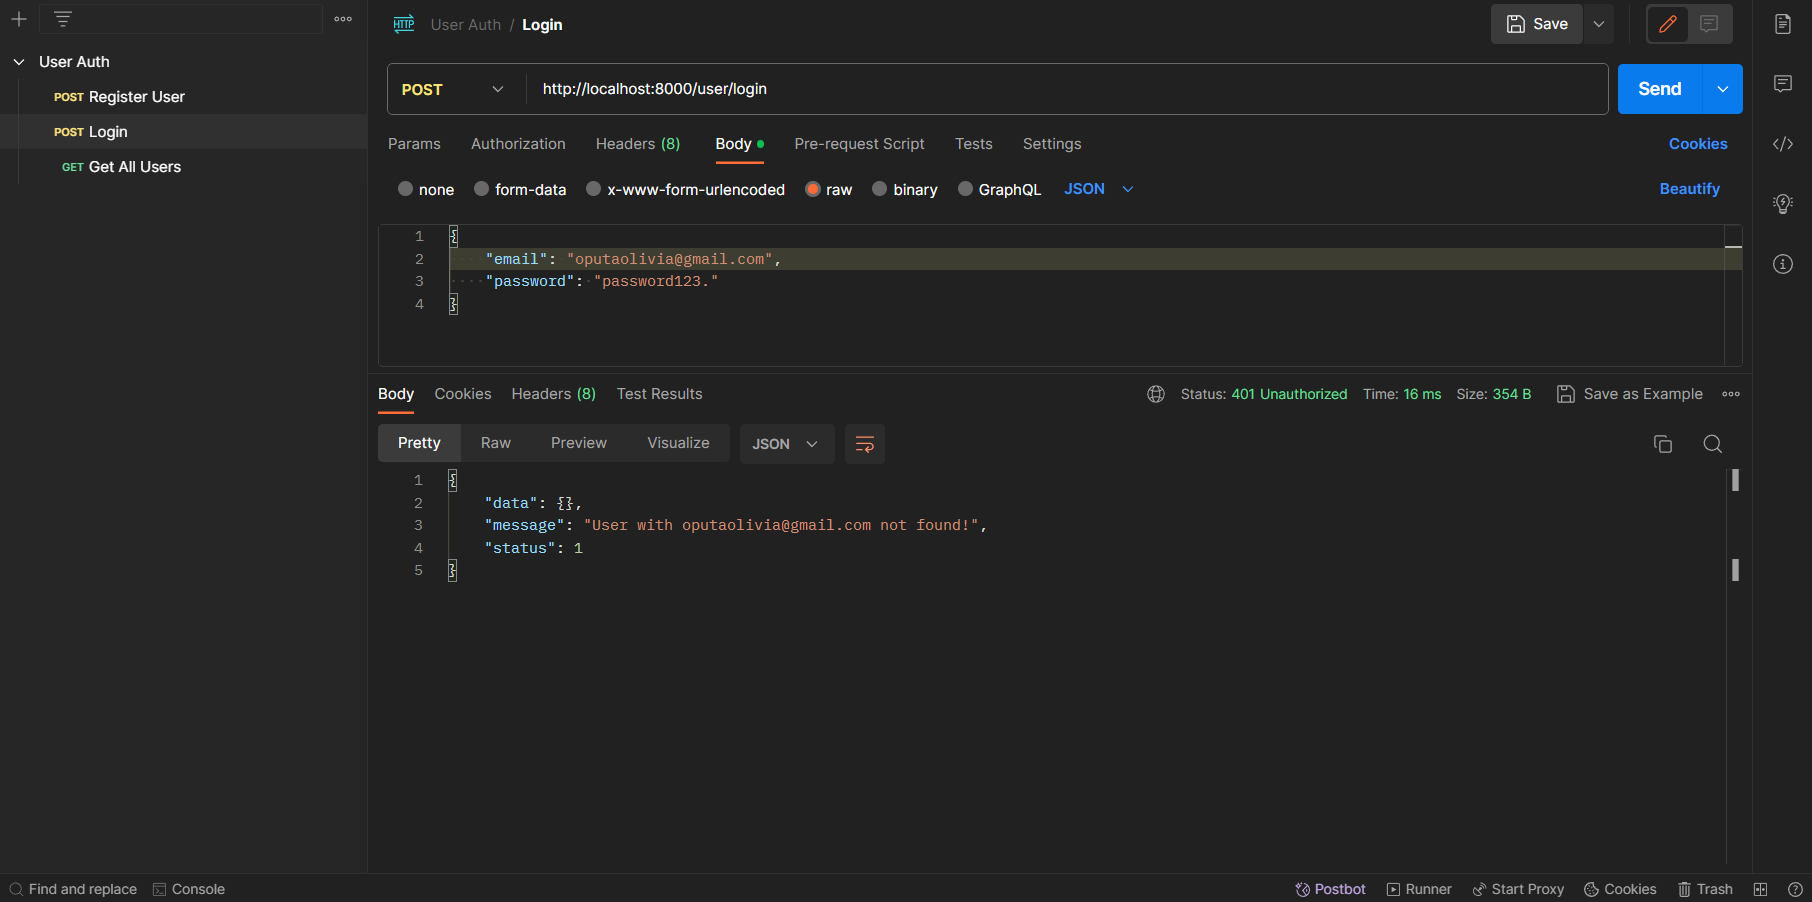
Now, let's do the opposite by using an email that's not in the database:
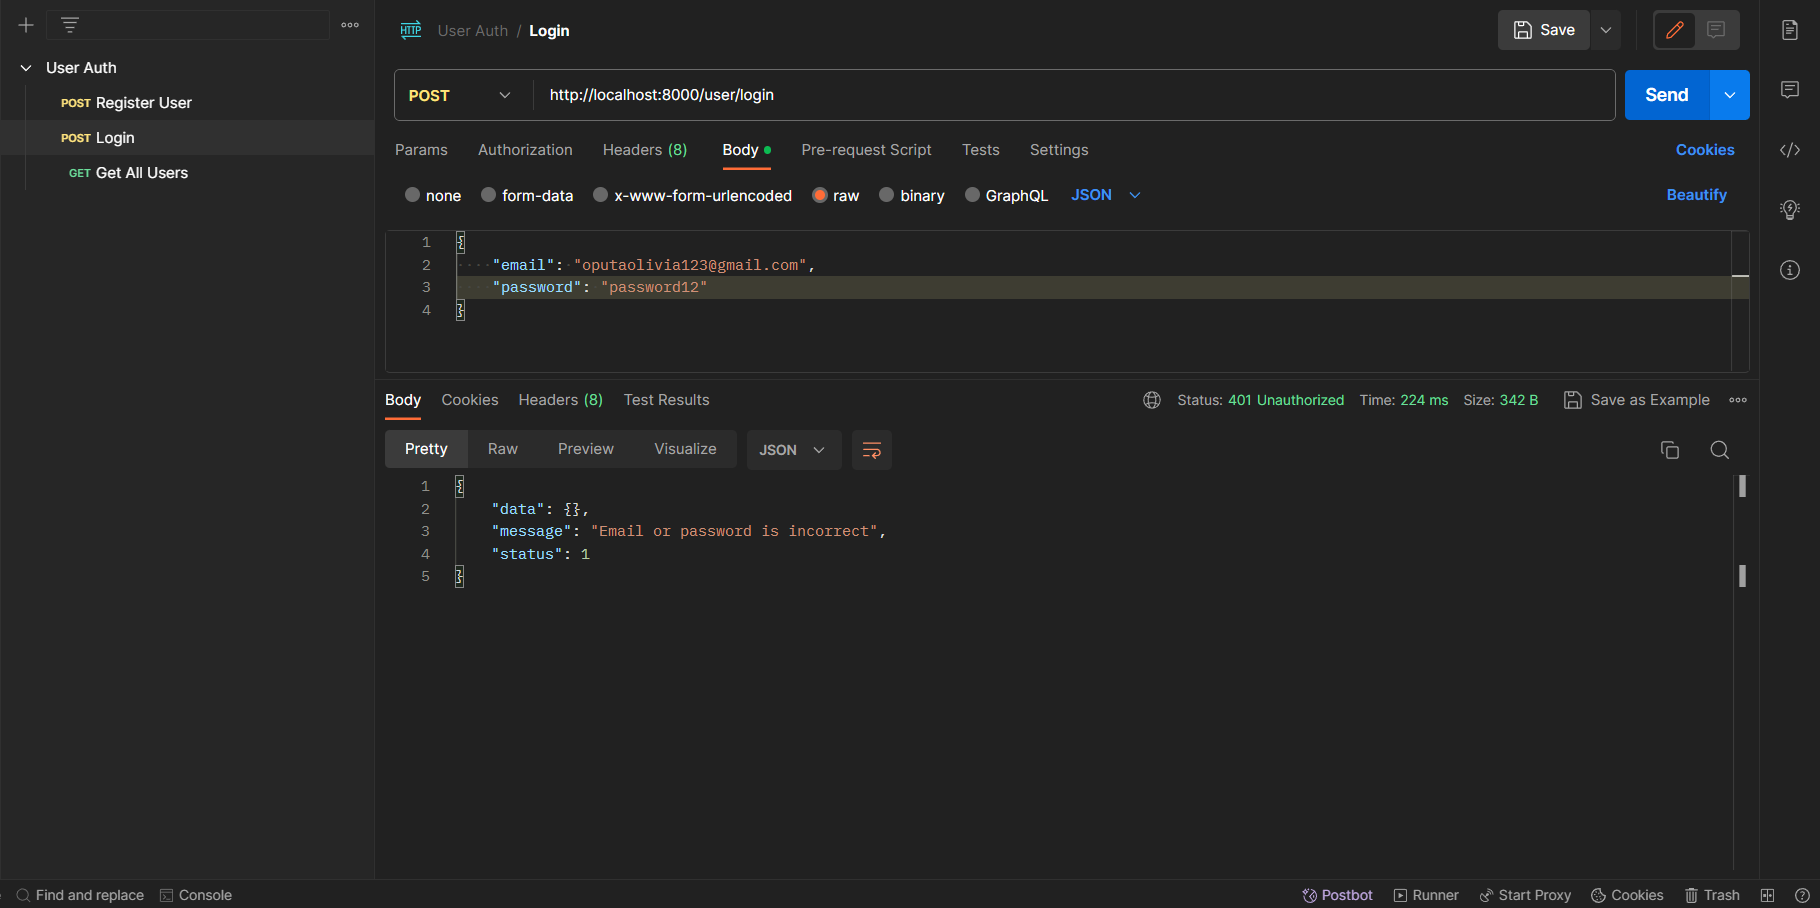
Finally, let's test with an incorrect password:
Get All Users Endpoint
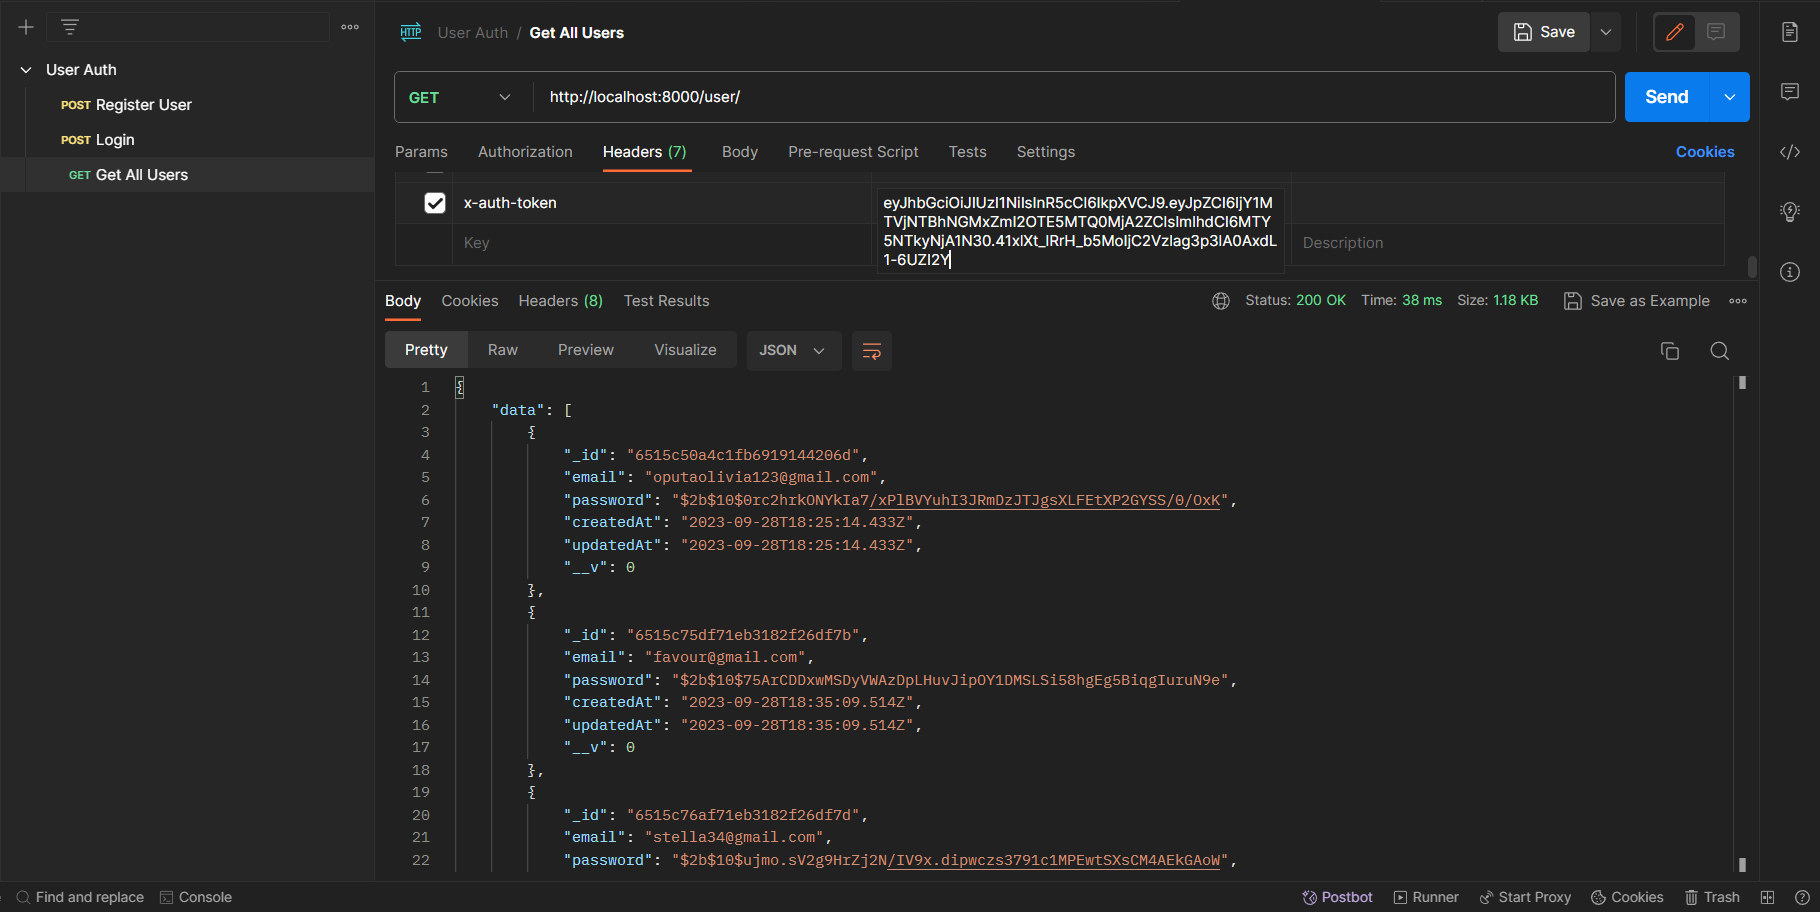
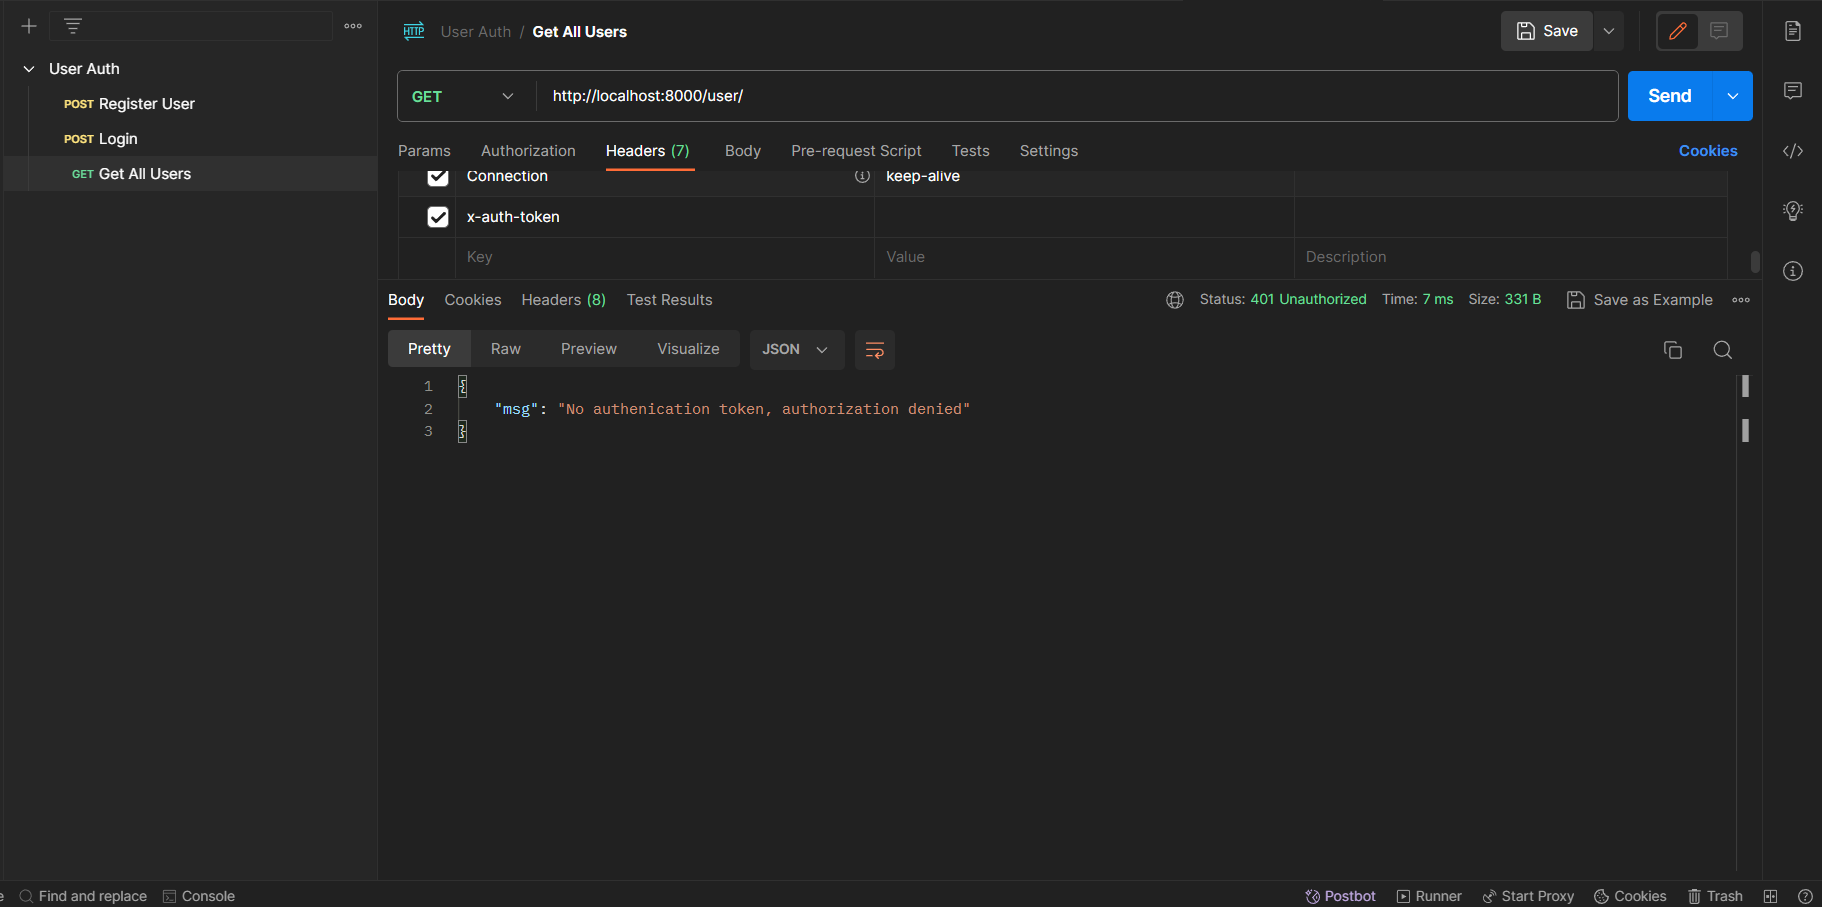
http://localhost:8000/user/Recall that this endpoint is a protected route, meaning that only specific persons can access it (authorization). In this case, only persons with an account and are logged in can access this route.
Since we are already logged in, we have to copy our generated token and paste it as an authorization parameter in Postman, without the token that endpoint is not accessible.
With Token:
Without Token:
Conclusion
In this article, we have been able to create a functional user authentication system (Just register and login); create a form of authorization and validate users using the express-validator module.
Thank you for Reading!


